Spring Cloud-Consul
Spring Cloud-Consul
Spring Cloud Consul 中文文档 参考手册 中文版
简介
Consul is a service mesh solution providing a full featured control plane with service discovery, configuration, and segmentation functionality. Each of these features can be used individually as needed, or they can be used together to build a full service mesh. Consul requires a data plane and supports both a proxy and native integration model. Consul ships with a simple built-in proxy so that everything works out of the box, but also supports 3rd party proxy integrations such as Envoy.
翻译:Consul是一个服务网格解决方案,提供了一个功能齐全的控制平面,具有服务发现、配置和分段功能。这些功能中的每一项都可以根据需要单独使用,也可以一起使用来构建一个完整的服务网格。Consul需要一个数据平面,并支持代理和原生集成模型。Consul提供了一个简单的内置代理,因此一切都可以开箱即用,但也支持第三方代理集成,如Envoy。
优点: 基于Raft协议,比较简洁;支持健康检查,同时支持HTTP和DNS协议支持跨数据中心的WAN集群,提供图形界面,跨平台,支持
linux、mac、windows
Consul的特点
consul的主要特点有:
- Service Discovery(服务发现):Consul的客户端可以注册一个服务,比如
api或mysql,其他客户端可以使用Consul来发现特定服务的提供者。使用DNS或HTTP,应用程序可以很容易地找到他们所依赖的服务。 - Health Checking(健康检查):Consul客户端可以提供任何数量的健康检查,要么与给定的服务相关联(如: “
webserver是否返回200 OK”),要么与本地节点相关联(如: “内存利用率是否低于90%”)。这些信息可以运维人员用来监控集群的健康状况,并被服务发现组件来路由流量(比如: 仅路由到健康节点) - KV Store(KV存储):应用程序可以利用Consul的层级K/V存储来实现任何目的,包括动态配置、功能标记、协调、领导者选举等。Consul提供了HTTP
API,使其非常简单以用。 - Secure Service Communication(安全服务通信):Consul可以为服务生成和分发
TLS( 传输层安全性协议)证书,以建立相互的TLS连接。可以使用Intention来定义哪些服务被允许进行通信。服务隔离可以通过可以实时更改Intention策略轻松管理,而不是使用复杂的网络拓扑结构和静态防火墙规则。 - Multi Datacenter(多数据中心):Consul支持开箱即用的多数据中心。这意味着Consul的用户不必担心建立额外的抽象层来发展到多个区域。
- 可视化的图形界面
Consul安装
这里使用docker部署。
拉取Consul镜像
$ docker pull consul # 默认拉取latest
$ docker pull consul:1.6.1 # 拉取指定版本
安装并运行
$ docker run -d -p 8500:8500 --restart=always --name=consul consul:latest agent -server -bootstrap -ui -node=1 -client='0.0.0.0'
- agent: 表示启动 Agent 进程。
- server:表示启动 Consul Server 模式
- client:表示启动 Consul
Cilent模式。 - bootstrap:表示这个节点是 Server-Leader ,每个数据中心只能运行一台服务器。技术角度上讲 Leader 是通过 Raft 算法选举的,但是集群第一次启动时需要一个引导 Leader,在引导群集后,建议不要使用此标志。
ui:表示启动 WebUI管理器,默认开放端口 8500,所以上面使用 Docker 命令把 8500 端口对外开放。- node:节点的名称,集群中必须是唯一的,默认是该节点的主机名。
client:consul服务侦听地址,这个地址提供HTTP、DNS、RPC等服务,默认是127.0.0.1所以不对外提供服务,如果你要对外提供服务改成0.0.0.0- join:表示加入到某一个集群中去。 如:
-json=192.168.0.11。
如果是云服务器请在云服务器平台中开放8500端口,如果是虚拟机那么需要关闭防火墙
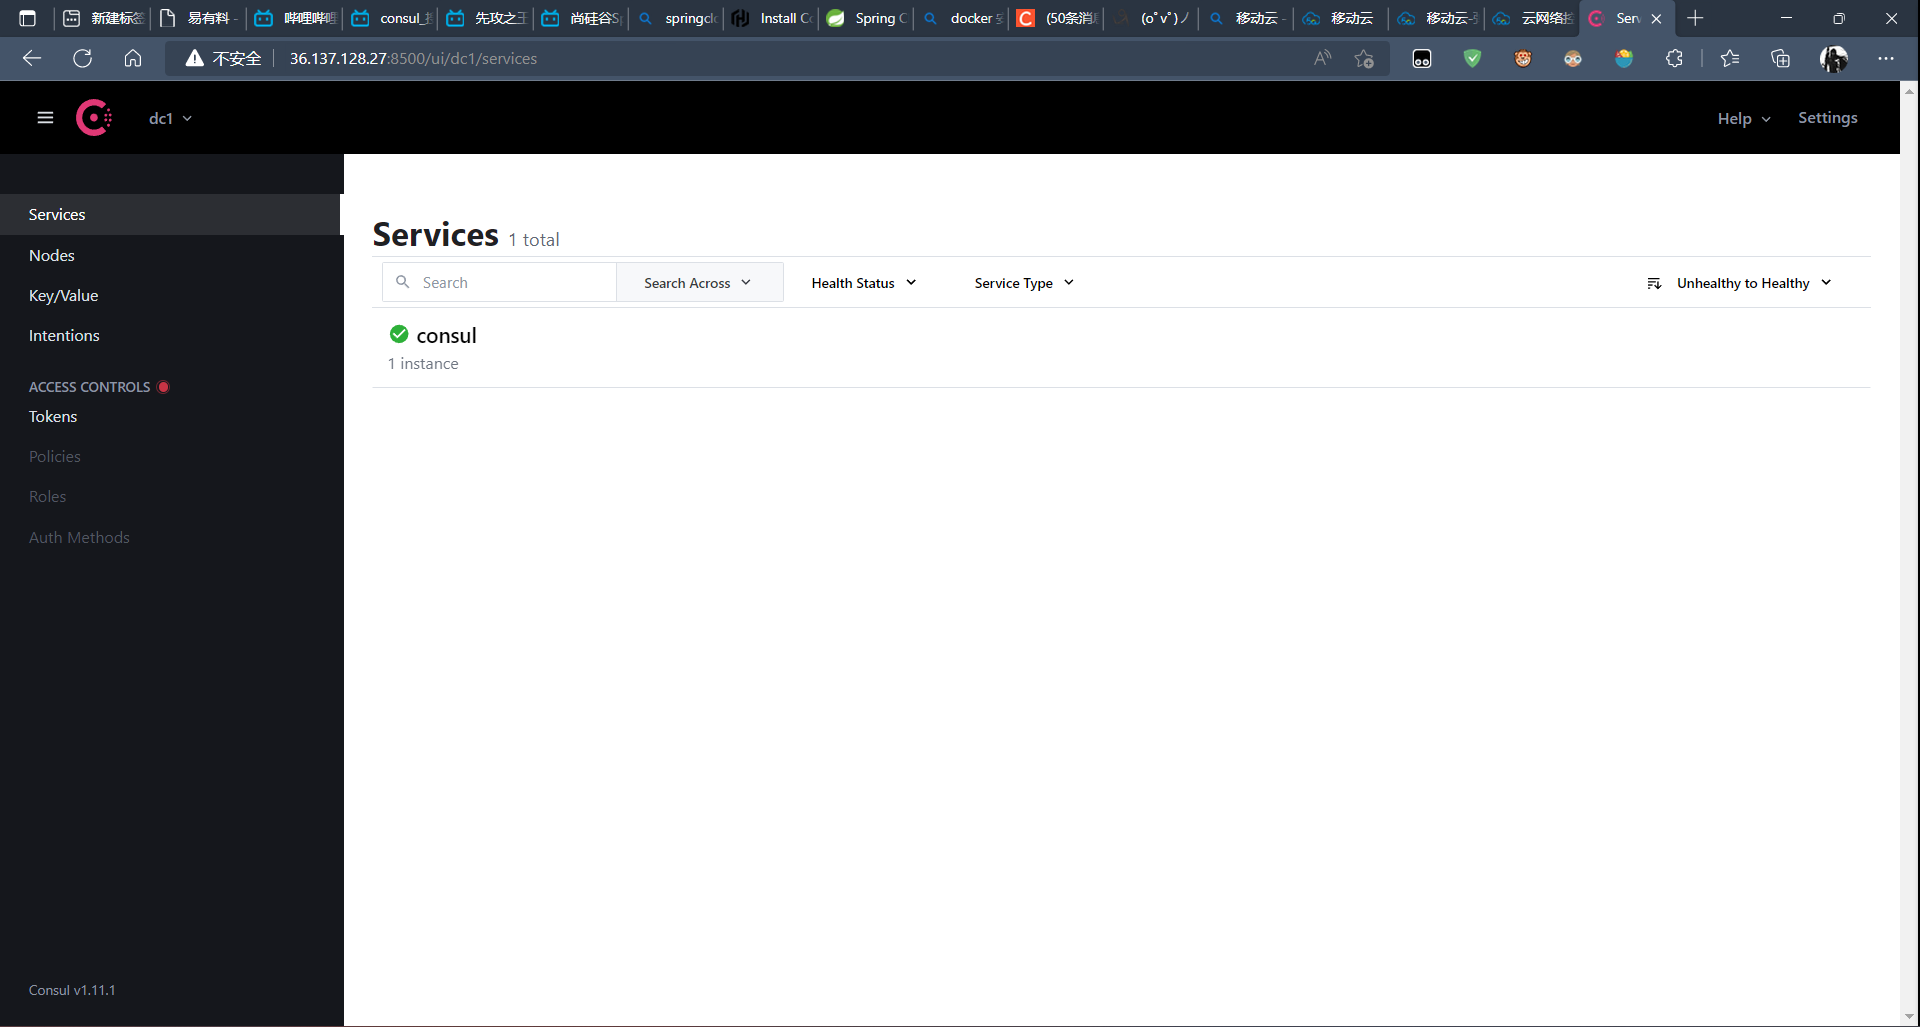
运行成功并且端口开放后,我们可以在访问
http://服务器ip:端口/ui,得到如下界面表示安装运行成功。
Spring Cloud整合Consul代替Eureka
新建父工程
新建工程
Cloud-04-Consul添加
pom.xml中的依赖
<project xmlns="http://maven.apache.org/POM/4.0.0"
xmlns:xsi="http://www.w3.org/2001/XMLSchema-instance"
xsi:schemaLocation="http://maven.apache.org/POM/4.0.0 http://maven.apache.org/xsd/maven-4.0.0.xsd">
<modelVersion>4.0.0</modelVersion>
<groupId>com.dyw</groupId>
<artifactId>Cloud-04-Consul</artifactId>
<version>1.0-SNAPSHOT</version>
<packaging>pom</packaging>
<modules>
<module>Cloud-consul-payment8006</module>
<module>Cloud-consul-order80</module>
</modules>
<properties>
<maven.compiler.source>8</maven.compiler.source>
<maven.compiler.target>8</maven.compiler.target>
<project.build.sourceEncoding>UTF-8</project.build.sourceEncoding>
<junit.version>4.12</junit.version>
<lombok.version>1.18.10</lombok.version>
<log4j.version>1.2.17</log4j.version>
<mysql.version>8.0.28</mysql.version>
<druid.version>1.2.11</druid.version>
<mybatis.spring.boot.version>2.1.1</mybatis.spring.boot.version>
<mybatis-plus>3.5.2</mybatis-plus>
</properties>
<!--子模块继承之后,提供作用:锁定版本+子module不用谢groupId和version-->
<dependencyManagement>
<dependencies>
<dependency>
<groupId>org.apache.maven.plugins</groupId>
<artifactId>maven-project-info-reports-plugin</artifactId>
<version>3.2.2</version>
</dependency>
<!--spring boot 2.2.2-->
<dependency>
<groupId>org.springframework.boot</groupId>
<artifactId>spring-boot-dependencies</artifactId>
<version>2.6.8</version>
<type>pom</type>
<scope>import</scope>
</dependency>
<!--spring cloud Hoxton.SR1-->
<dependency>
<groupId>org.springframework.cloud</groupId>
<artifactId>spring-cloud-dependencies</artifactId>
<version>2021.0.3</version>
<type>pom</type>
<scope>import</scope>
</dependency>
<!--spring cloud 阿里巴巴-->
<dependency>
<groupId>com.alibaba.cloud</groupId>
<artifactId>spring-cloud-alibaba-dependencies</artifactId>
<version>2021.1</version>
<type>pom</type>
<scope>import</scope>
</dependency>
<!--mysql-->
<dependency>
<groupId>mysql</groupId>
<artifactId>mysql-connector-java</artifactId>
<version>${mysql.version}</version>
<scope>runtime</scope>
</dependency>
<!-- druid-->
<dependency>
<groupId>com.alibaba</groupId>
<artifactId>druid-spring-boot-starter</artifactId>
<version>${druid.version}</version>
</dependency>
<!--mybatis-->
<dependency>
<groupId>org.mybatis.spring.boot</groupId>
<artifactId>mybatis-spring-boot-starter</artifactId>
<version>${mybatis.spring.boot.version}</version>
</dependency>
<dependency>
<groupId>com.baomidou</groupId>
<artifactId>mybatis-plus-boot-starter</artifactId>
<version>${mybatis-plus}</version>
</dependency>
<!--junit-->
<dependency>
<groupId>org.springframework.boot</groupId>
<artifactId>spring-boot-starter-test</artifactId>
<version>2.6.8</version>
</dependency>
<!--log4j-->
<dependency>
<groupId>log4j</groupId>
<artifactId>log4j</artifactId>
<version>${log4j.version}</version>
</dependency>
</dependencies>
</dependencyManagement>
<build>
<finalName>SpringCloud-Hello-01</finalName>
<plugins>
<plugin>
<groupId>org.springframework.boot</groupId>
<artifactId>spring-boot-maven-plugin</artifactId>
<configuration>
<fork>true</fork>
<addResources>true</addResources>
</configuration>
</plugin>
</plugins>
</build>
</project>
创建生产者
创建工程
Cloud-zookeeper-payment8006pom.xml配置依赖
<project xmlns="http://maven.apache.org/POM/4.0.0"
xmlns:xsi="http://www.w3.org/2001/XMLSchema-instance"
xsi:schemaLocation="http://maven.apache.org/POM/4.0.0 http://maven.apache.org/xsd/maven-4.0.0.xsd">
<parent>
<artifactId>Cloud-04-Consul</artifactId>
<groupId>com.dyw</groupId>
<version>1.0-SNAPSHOT</version>
</parent>
<modelVersion>4.0.0</modelVersion>
<artifactId>Cloud-consul-payment8006</artifactId>
<properties>
<maven.compiler.source>8</maven.compiler.source>
<maven.compiler.target>8</maven.compiler.target>
<project.build.sourceEncoding>UTF-8</project.build.sourceEncoding>
</properties>
<dependencies>
<dependency>
<groupId>org.springframework.boot</groupId>
<artifactId>spring-boot-starter-web</artifactId>
</dependency>
<dependency>
<groupId>org.springframework.boot</groupId>
<artifactId>spring-boot-starter-actuator</artifactId>
</dependency>
<!-- springcloud 整合consul的依赖-->
<dependency>
<groupId>org.springframework.cloud</groupId>
<artifactId>spring-cloud-starter-consul-discovery</artifactId>
<version>3.1.1</version>
</dependency>
<dependency>
<groupId>org.bouncycastle</groupId>
<artifactId>bcprov-jdk15on</artifactId>
<version>1.70</version>
</dependency>
<dependency>
<groupId>com.google.guava</groupId>
<artifactId>guava</artifactId>
<version>31.1-jre</version>
</dependency>
<dependency>
<groupId>org.projectlombok</groupId>
<artifactId>lombok</artifactId>
</dependency>
<!--入门项目中用到的公用类包-->
<dependency>
<groupId>com.dyw</groupId>
<artifactId>Cloud-api-commons</artifactId>
<version>1.0-SNAPSHOT</version>
</dependency>
<dependency>
<groupId>org.springframework.boot</groupId>
<artifactId>spring-boot-devtools</artifactId>
<scope>runtime</scope>
<optional>true</optional>
</dependency>
</dependencies>
</project>application.yml配置server:
port: 8006
spring:
application:
name: cloud-provider-payment
# consul注册中心的地址
cloud:
consul:
host: 36.137.128.27
port: 8500
discovery:
service-name: ${spring.application.name}
# 开启心跳检测
heartbeat:
enabled: true主启动类
//该注解用于向使用consul或者zookeeper作为注册中心时注册服务
public class PaymentMain8006 {
public static void main(String[] args) {
SpringApplication.run(PaymentMain8006.class,args);
}
}控制器类
public class PaymentController {
private String serverPort;
public String paymentzk(){
return "springcloud with consul: "+serverPort+"\t"+ UUID.randomUUID().toString();
}
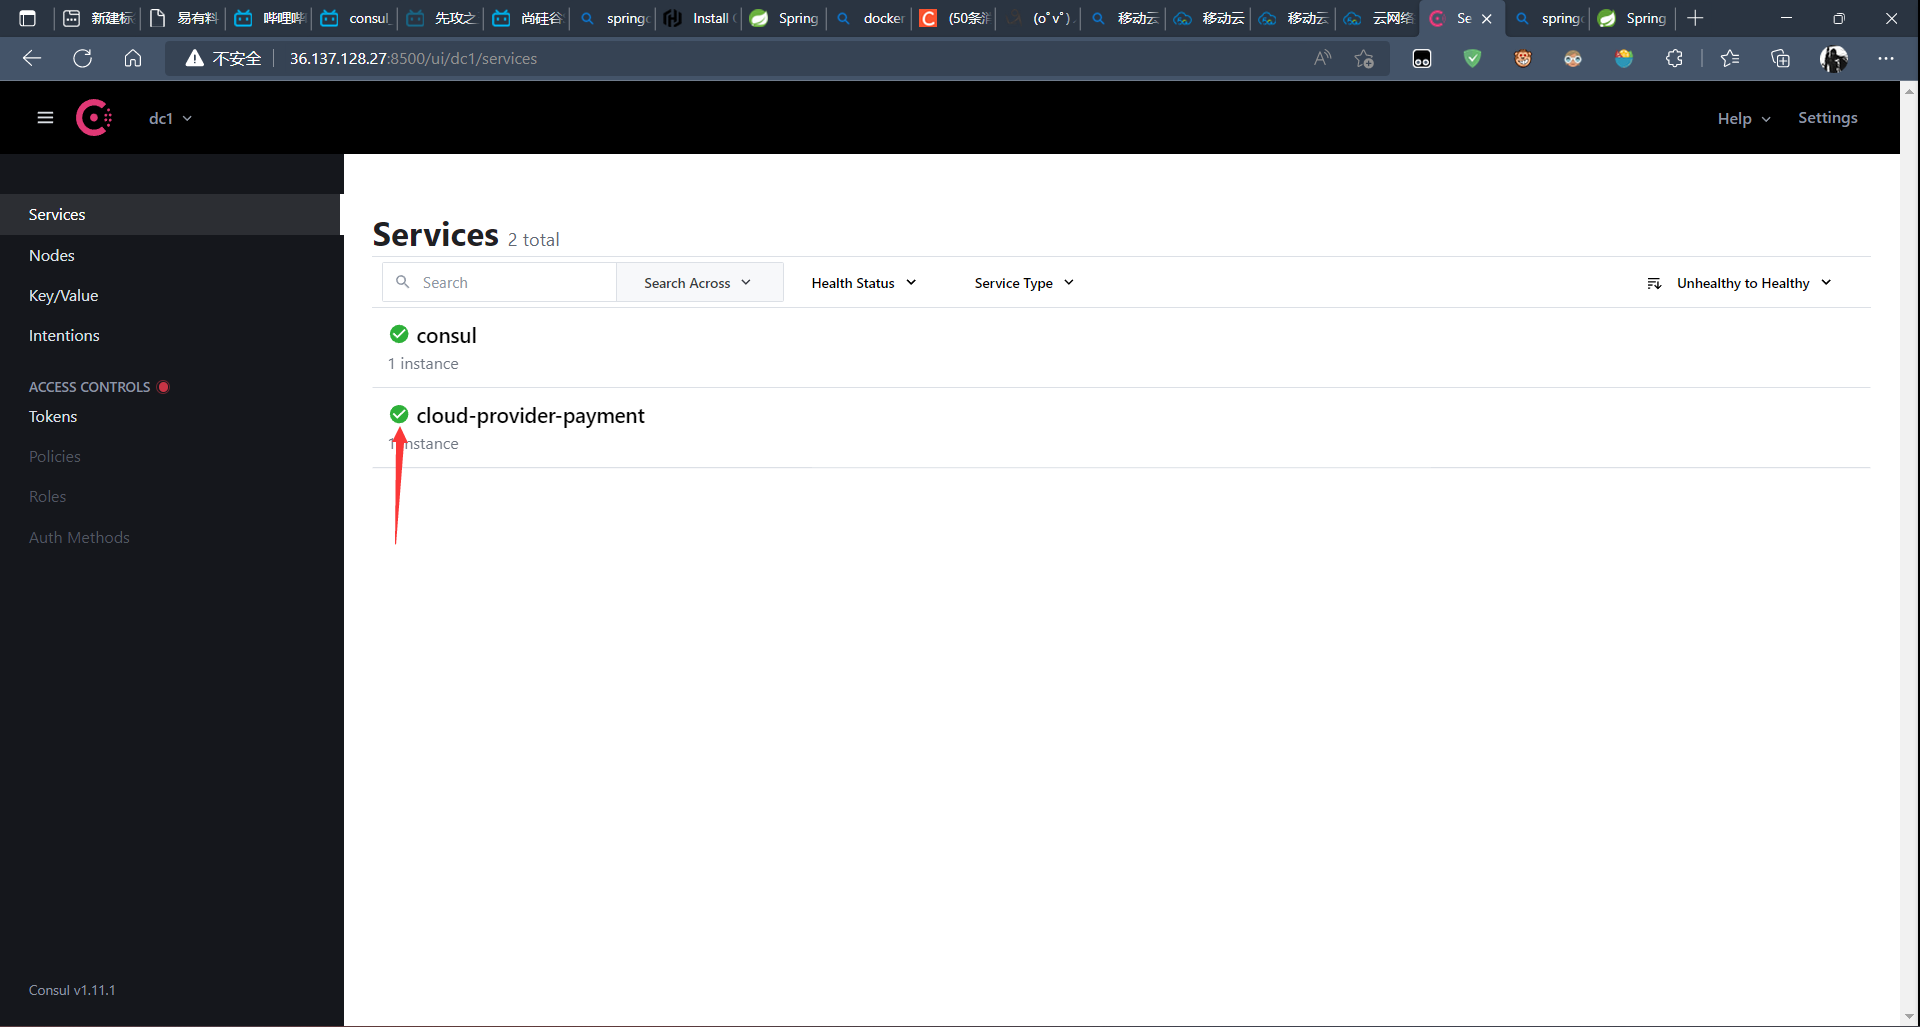
}启动图形界面检测测试

接口访问测试
http://localhost:8006/payment/consul
创建消费者
创建工程
Cloud-consul-order80添加
pom.xml依赖
<project xmlns="http://maven.apache.org/POM/4.0.0"
xmlns:xsi="http://www.w3.org/2001/XMLSchema-instance"
xsi:schemaLocation="http://maven.apache.org/POM/4.0.0 http://maven.apache.org/xsd/maven-4.0.0.xsd">
<parent>
<artifactId>Cloud-04-Consul</artifactId>
<groupId>com.dyw</groupId>
<version>1.0-SNAPSHOT</version>
</parent>
<modelVersion>4.0.0</modelVersion>
<artifactId>Cloud-consul-order80</artifactId>
<properties>
<maven.compiler.source>8</maven.compiler.source>
<maven.compiler.target>8</maven.compiler.target>
<project.build.sourceEncoding>UTF-8</project.build.sourceEncoding>
</properties>
<dependencies>
<dependency>
<groupId>org.springframework.boot</groupId>
<artifactId>spring-boot-starter-web</artifactId>
</dependency>
<dependency>
<groupId>org.springframework.boot</groupId>
<artifactId>spring-boot-starter-actuator</artifactId>
</dependency>
<!-- springcloud 整合consul的依赖-->
<dependency>
<groupId>org.springframework.cloud</groupId>
<artifactId>spring-cloud-starter-consul-discovery</artifactId>
<version>3.1.1</version>
</dependency>
<dependency>
<groupId>org.bouncycastle</groupId>
<artifactId>bcprov-jdk15on</artifactId>
<version>1.70</version>
</dependency>
<dependency>
<groupId>com.google.guava</groupId>
<artifactId>guava</artifactId>
<version>31.1-jre</version>
</dependency>
<dependency>
<groupId>org.projectlombok</groupId>
<artifactId>lombok</artifactId>
</dependency>
<!--入门项目中用到的公用类包-->
<dependency>
<groupId>com.dyw</groupId>
<artifactId>Cloud-api-commons</artifactId>
<version>1.0-SNAPSHOT</version>
</dependency>
<dependency>
<groupId>org.springframework.boot</groupId>
<artifactId>spring-boot-devtools</artifactId>
<scope>runtime</scope>
<optional>true</optional>
</dependency>
</dependencies>
</project>application.yml配置server:
port: 80
spring:
application:
name: cloud-provider-order
cloud:
consul:
host: 36.137.128.27
port: 8500
discovery:
service-name: ${spring.application.name}
heartbeat:
enabled: true主启动类
public class OrderMain80 {
public static void main(String[] args) {
SpringApplication.run(OrderMain80.class, args);
}
}配置类 配置
RestTemplate
public class ContextConfig {
//开启RestTemplate的负载均衡
public RestTemplate restTemplate(){
return new RestTemplate();
}
}控制器类
public class OrderConsulController {
public static final String INVOKE_URL = "http://cloud-provider-payment";
private RestTemplate restTemplate;
public String paymentInfo(){
String result = restTemplate.getForObject(INVOKE_URL + "/payment/consul", String.class);
return result;
}
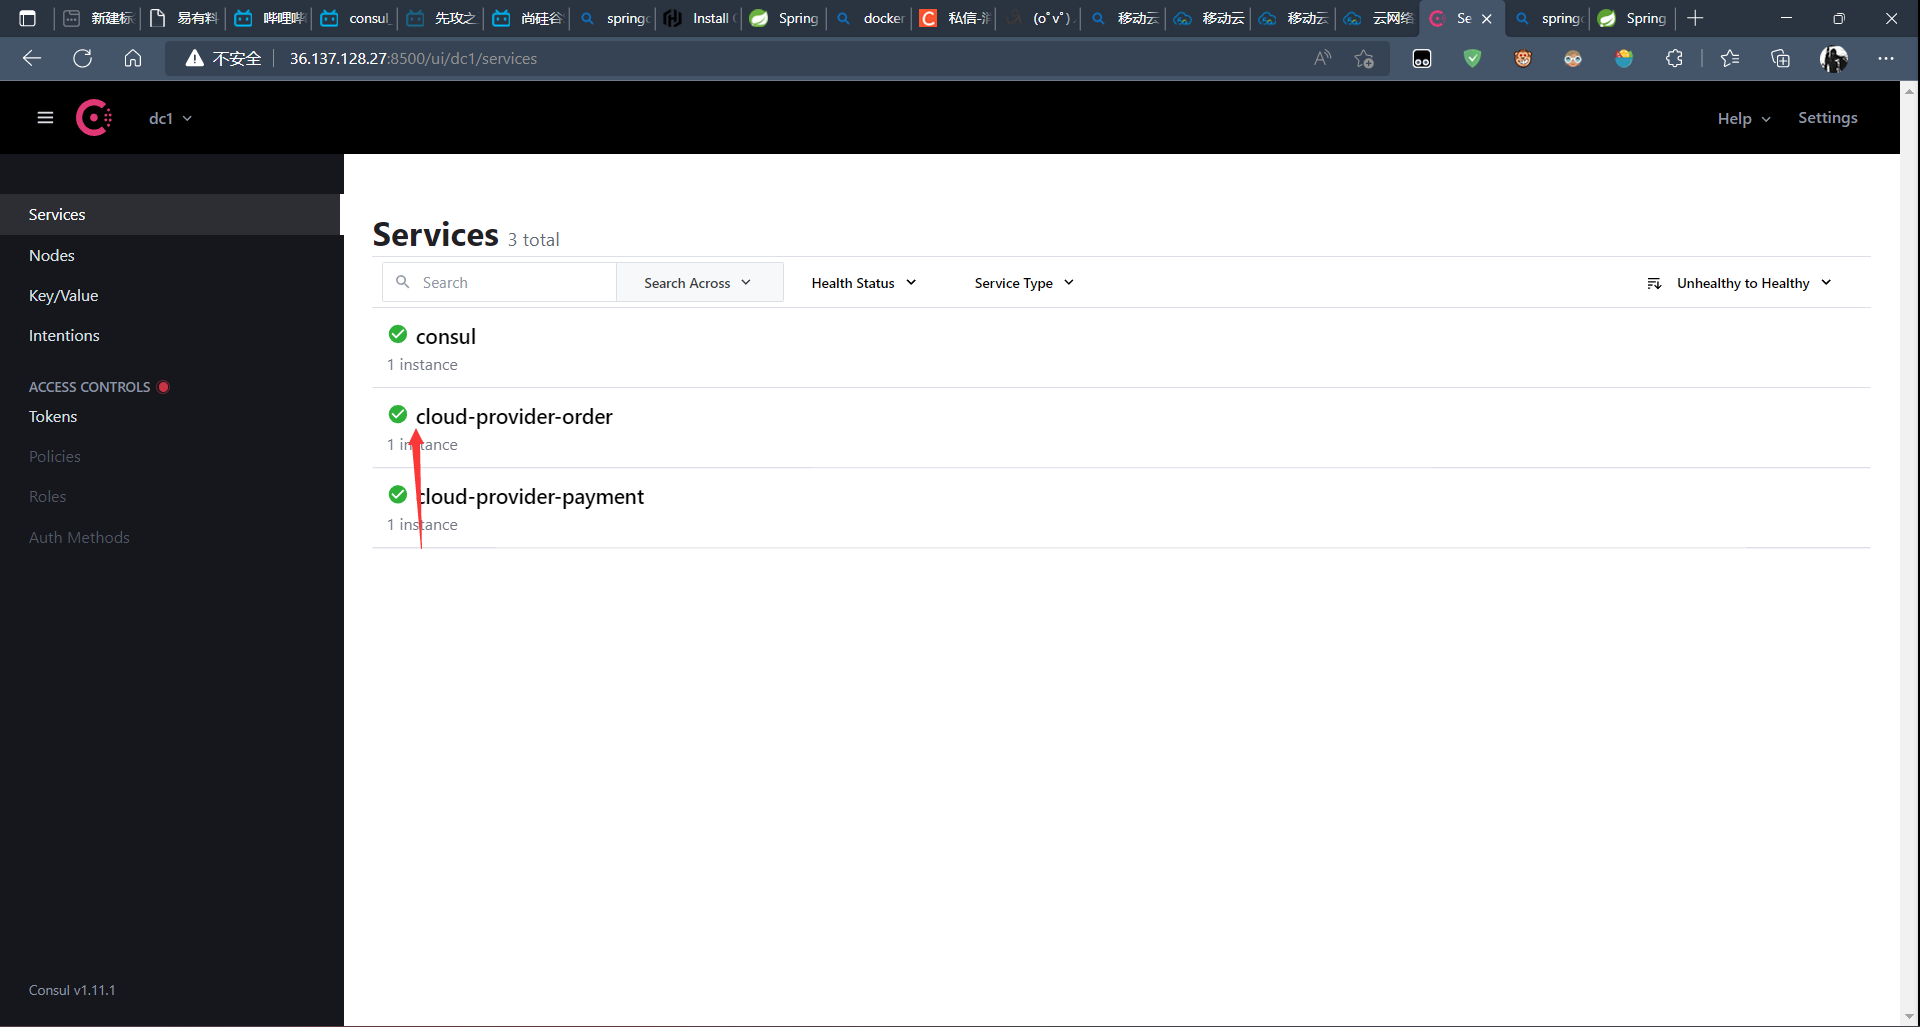
}启动图形界面检测测试

接口访问测试
http://localhost:81/consumer/payment/consul
生产者集群
与Eureka类似,只需要多个提供相同的服务的生产者注册到同一个服务名称下即可,如果要使用消费者的RestTemplate访问记得加上@LoadBalanced注解即可(负载均衡 如果不加会报错)。
Consul、Zookeeper和Eureka之间的区别
| 组件名 | 语言 | CAP | 服务健康检查 | 对外暴露接口 | Spring Cloud集成 |
|---|---|---|---|---|---|
| Eureka | Java | AP | 可配支持 | HTTP |
已集成 |
| Consul | Go | CP |
支持 | HTTP/DNS |
已集成 |
| Zookeeper | Java | CP |
支持 | 客户端 | 已集成 |
相关文章:CAP理论


